Installing the EA Pip Scalper
Installing the EA Pip Scalper
The EA Pip Scalper system is a brand new automated Forex trading system, one that actually produces real profits. With that being said, you do first need to install it, and this is easier said than done. In fact, installing it is the hardest part of the process. Today, we will take you on an in depth EA Pip Scalper installation guide, with easy to follow instructions.
Step 1
First off, before you can do anything, you need to purchase the EA Scalper Forex autotrader. Follow the links provided here today to get to the official EA Pip Scalper website. Once you have gotten to the official site, click on any of the “buy now” links that are present.
You will need to fill out some details and payment info to make the purchase. Once you have made the payment, and you will then be able to download it. In your email, you will get an invoice along with the license number key number for your copy of the software in your email. The software costs only $399 to buy.
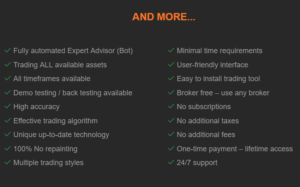
Yes, this is a onetime payment and there are no other fees or costs, not ever. Once you pay the $399 cost, you own that copy of the EA Pip Scalper system, and you will never have to pay another cent your whole life. It is 100% yours.
Step 2
With the EA Scalper paid for and downloaded, the next step in the process is to open up the file you just downloaded, the one containing the bots. Something to note is that this FX trading software is designed to work with both MT4 and MT5 (MetaTrader 4 and MetaTrader 5). The file you downloaded contains both bots for both platforms.
MQL4 is for MetaTrader 4 and MQL5 is for MetaTrader 5. Before you continue with the installation, ensure that you know which version of MetaTrader you will be using.
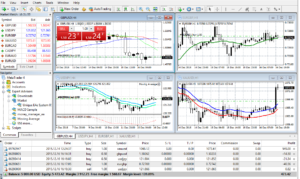
Now, with that problem out of the way, open up the MetaTrader platform, and then go to the top left of the screen. Select the “file” tab, then open “experts” folder. With the experts folder open, go back to the original EA Pip Scalper file, and then and copy and paste the appropriate version (MQL4 for MT4 or MQL5 for MT5), into the experts folder.
It’s a simple copy and paste job. If you still don’t know which version to copy and paste, the good thing is that you can actually copy and paste both of them, as the correct version will work, and other one won’t do anything. With this done, close the window and move onto step 3.
Step 3
Now, go to the left hand side of MetaTrader. Roughly half of the way down the left side, there is a tab labeled as “navigator”. Once in in this navigator tab, click on the tab that says “expert advisors”, then, with the tab selected, right click on your mouse and hit the “refresh” button. This will cause the EA Pip Scalper to be displayed. You should now see the EA Pip Scalper present in the list of expert advisors within the navigator tab.
Step 4
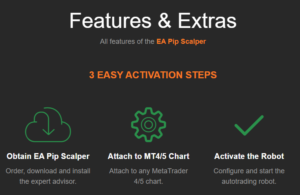
With step 3 complete, step 4 is to attach the EA Pip Scalper Forex autotrader to your MetaTrader platform. To start, start from the same navigator tab as we discussed in the previous step. You should see the EA Scalper app listed in there.
Select the EA Pip Scalper app, and then drag and drop it onto the platform. Click it, hold down the left click button on your mouse, drag it over onto the main part of the platform (onto the chart section), and release the mouse. With this done, a new window should now appear.
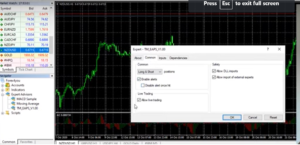
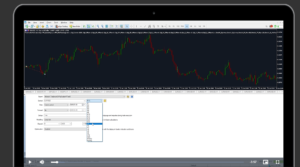
In the new window, go to the “common” tab, which is the second from the left. With the common tab open, there are various settings that you need to activate. The settings you need to activate include “allow live trading”, “allow DLL imports”, “allow input of external experts” and “enable alerts”. If these settings are not all turned on, the EA Pip Scalper will not work properly, or work at all.
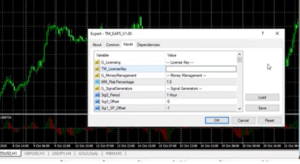
Now you will move from the “common” tab to the “inputs” tab, just to the right of it. Under the inputs tab, you will see a small section where you will have to enter your license key for your copy of the Pip Scalper. You received this license key when you paid the bot. You should have a copy of the license key in your email, in your purchase invoice that you got with your purchase. Copy and paste the license code into the designated section, and then click on “OK”.
Step 5
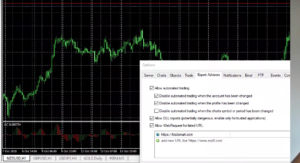
This next step involves going to the top of your MetaTrader platform. Select “tools” tab, then within this tools tab, select the “options” tab, and then within the options tab, select the “expert advisors” tab.
Once you are within the expert advisors tab, you need to ensure that all of the settings, all but one, are activated. The only box which should not be activated is the one labelled “disable automated trading when the chart symbol or period is changed”. Everything else should be turned on.
Now that you have gone through these 5 crucial EA Pip Scalper installation steps, your Forex autotrader should be 100% functional and ready to put money in your pocket.
EA Pip Scalper Installation Tutorial – Final Thoughts
Folks, please remember to follow all of the steps outlined above to the tee. If you miss any one of the steps as outlined above, your version of the EA Pip Scalper app will not work properly.
With your copy of the EA Pip Scalper installed, you can now activate it to being automated Forex trading.
The bottom line is that this app is one of the best Forex autotraders out there at this time. If you are interested in making easy money through currency trading, we recommend giving it a try.


